 |
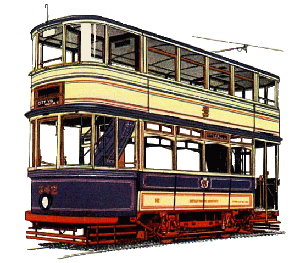
Sheffield Picture Gallery Site URL: http://www.cyberpictures.net/sheffield/ Electric Services introduced on 6 September 1899 System Closed on 8 October 1960 [ Picture Gallery | Visitor Feedback | Links Page | ] |
|
Sadly, my slides taken of this tramway system have deteriorated considerably over the forty years of storage.
Some attempt has been made to electronically restore these historically interesting pictures but they are
really beyond the point of no return. Please bear this in mind when viewing the pictures. Click on any thumbnail for a larger image but wait until all thumbnails have downloaded. |
|||
;)
;)
;) Pictures 3, 4 and 5 These photographs show Sheffield's trams at the Wadsley Bridge terminus. Trams departed from here to
travelled, from where it will return to Woodseats [via Queen's Road according to the destination blind]. This will
take it from the north side of the city to the extreme south side, on the Chesterfield Road. |
;) Picture 181 Meadowhead terminus on the Chesterfield Road [now the A61], looking towards Chesterfield |
||
;) Picture 182 A 'Roberts' car 502 at the Woodseats terminus. The tram has its destination blind already set for the return journey and is about to proceed over the trailing crossover (part of which can be seen in the left foreground) to gain the left hand track and return down Chesterfield Road to Heeley and then Queens Road and through the City. |
;) Picture 183 Also on Abbey Lane, approximately half way between Woodseats and Beauchief, very close to Beauchief Abbey. Here the tramway was segregated from the Road. Today, the former tramway is used as a private road to service the houses behind the tram, and the central grass verge has had its driveways grassed over. This section of line [along Abbey Lane only] was closed 1st March 1959. The destination shows 'SPECIAL' and the number of photographers suggest that this may be tour of the system not long before closure of this route. |
||
;)
;)
;) Pictures 187, 188 and 184 Pictures 187 and 188 are at Sheffield Lane Top, the re-appearance of car 525 in the next picture 184, at the Wadsley Bridge terminus on the Halifax Road, showing 'SPECIAL' again suggests that these photographs were taken on the same day. In picture 187 car 525 is at the junction of Stubbin Lane with Barnsley Road. The tram is climbing Stubbin Lane, having come through Firth Park and joins Barnsley Road for the final short climb to the terminus. This is shown in picture 188, where car 525 is seen outside the Pheasant Inn on Barnsley Road. The tram will head down the hill past the photographer back towards the city centre. From: Bob Wardle <RSWardle@aol.com> The first picture [187] of Roberts car 525 rounding the bend from Stubbin Lane on to Barnsley Road is very unusual in that it looks south; it is the only one I recall seeing. For me it is memorable because you can make out the upper storeys of the Firth Park Grammar School building, which I attended 1958 to 1965. A close look at the track reveals that it is brand new; I recall very clearly that it was beautifully re-laid only about sixteen months before abandonment, and that places the picture firmly between September 1958 and April 1960. The track on this severely graded and sharp curve was very badly side-cut by the flanges of the wheels prior to this relaying. |
|||
;) Picture 189 Taken later the same day, and again shows Roberts car 525. After returning through Firth Park and down to Grimesthorpe, it is seen passing underneath the railway bridge on Upwell Street to join Brightside Lane and continue back to The Wicker and into the city centre. This road was closed to trams on 1st March 1959, the same day as the Abbey Lane section. |
;) Picture 190 The proximity of the houses to the road suggest that this is still on the 'industrial' side of the city; probably the Neepsend or Attercliffe areas. |
||
;) Picture 191 Pictured on Abbeydale Road, at the junction with Abbey Lane. The stone building to the left of the tram is Beauchief Hotel, which is the only thing still recognizable. Abbey Lane comes down between the Hotel and stone building to the left of the picture [which has now been demolished and replaced with a petrol station]. Note the clock suspended on the lamppost, and the shelter at the tram stop to the right. After the Abbey Lane section to Woodseats closed on 1st March 1959 this was the terminus - the trailing points can be seen in the foreground, and the second set of tracks are covered with a crude layer of tarmac. This is now just an ordinary bus stop, and the road has been widened to take in the point where the tram is stopped. Car 502 is seen ready to depart for Vulcan Road on the morning of the last day of operation [torrential rain began at noon and did not cease until early evening]. Vulcan Road was on the opposite side of the city, in the centre of Industrial 'Steel City'. |
|||
;) Picture 192 This is London Road, near Heeley. The tram is descending the hill towards Heeley at the junction with Queens Road. It will be heading for Meadowhead, or [if before March 1959] will follow the Meadowhead route to Woodseats before branching off to follow Abbey Lane and Abbeydale Road until it finds itself back on London Road heading in the opposite direction! From: Joseph Tierney <jt@tierneyhome.fsnet.co.uk> I can't help being convinced that this picture is not London Road at Heeley. From: Robert Grant <Robert@grant2222.freeserve.co.uk> You are spot on with the location and the cinema in the background is indeed the old 'Abbeydale'. From: Stewart A. Rotherham <Stewart.Rotherham@mottmac.com> Having looked at this picture I can confirm your correspondent's opinion the picture shows Abbeydale Road
at its junction with Broadfield Road [NB NOT Bradfield Road][on the right, going down past Heeley Swimming Baths]
and Sheldon Road [on left, going up towards Nether Edge). The fleapit in the background was the Abbeydale
Cinema. From: Peter Dewsnap in South Carolina <pdewsnap@sccoast.net> Very familiar to me. It is Abbeydale. You can see the Abbeydale Picture Palace in the background. Broadfield Road goes off to the right. |
|||
;)
;) Pictures 193 and 200 These show Sheffield Road with the junction of Vulcan Road, looking towards Rotherham. The buildings in the background are those of Hadfields Steel Works, and you will not be surprised to know have been swept away! The buildings are now the site of Meadowhall shopping centre, and this is a busy road linking the shopping centre with Junction 34 of the M1. |
;) Picture 201 Picture 201 was taken from the same place as 193 and 200 and shows standard car 97 approaching Vulcan Road. This car reappears in picture 200. Was 201 taken before 200, with the tram approaching; whereupon you swung round and took another photograph of it turning into Vulcan Road as car 183 pulled out? |
||
;)
;) Pictures 196 and 198 These pictures are taken on The Wicker, which is the main street linking the city centre with Attercliffe Road and Brightside. The railway arch spanning the road was built by the Sheffield, Manchester and Lincolnshire Railway [later the Great Central], and was crossed immediately after leaving Sheffield Victoria for Manchester via the Woodhead route. |
;)
;) Pictures 197 and 203 Taken on The Wicker, together with 196 and 198. Pictures 196 and 198 are in the direction of Attercliffe and Tinsley. This was once the point where three tram routes converged to make there way to the city centre. I can't make out any overhead wiring climbing Spital Hill [which is the road climbing quite steeply through the left hand side of the arch], so these pictures were taken after 3rd April 1960, by which time the only route left was that along Attercliffe Road to Tinsley and Vulcan Road [surviving until 8th October 1960]. |
||
;)
;) Pictures 194 and 195 On the Abbeydale Road, between Beauchief [picture 191] and Millhouses. Picture 194 shows a Roberts car heading away from the photographer, towards the city, with Ecclesall Woods on the left. Picture 195 was taken a little further towards Millhouses and is taken in the opposite direction, and again shows a Roberts car heading towards the city. |
;) Picture 202 Attercliffe Road. I had never heard of a pub called 'The Tram Car', but a
web-search uncovered
a site detailing all of the pubs in Sheffield in the 1950s, giving the location of this as 851 Attercliffe Road -
isn't it amazing what you can find out on the web? Car 501 is heading for the city and Beauchief. This scene is
unrecognisable now - I don't think that any of the buildings visible are still standing. The area to the right now
forms the entrance to Don Valley Stadium which was built in 1991 as part of the facilities provided for the World
Student Games. |
||
;) Picture 199 Shown are two Roberts cars on Vulcan Road, next to the Steel Works. The presence of several enthusiasts and the dilapidated condition of the trams [Sheffield took a well-justified pride in the smart condition of its fleet and only let this lapse in the last month or so of operation] singles the picture out as a 'last day' shot. |
;) Picture 204 Tinsley Depot. As cars came out of service on last day, they ran out to Tinsley Depot rather than returning to
Tenter Street [which by then was the last operational depot]. In the days and weeks following closure of the
system, the trams were hauled across the road [via a specially-laid siding] straight into the scrap yard of T W Ward.
The very last service car [#222] arrived about 4pm. David Johnson travelled on that car on its last journey and if
this is a picture of #222, he is somewhere in the crowd at the back. |
;) ;) Pictures 6 and 7
Pictures 6 and 7Sheffield 189 operating at Crich c1967. |
|
|
From: Bob Wardle <RSWardle@aol.com> Pictures 6 & 7 showing car 189 operating at Crich must be at least 1964; electric cars only operated there for the first time in July of that year. At that time the line was incredibly short, about up to the site of the present depot gates. The upper photo shows 189 nearer to a point by the present Bandstand, which indicates a date even later in the 1960's, and I wouldn't be surprised if it was 1967. In that year, the museum organised an entirely Sheffield day, with cars 46, 189, 264 and 510 all running at the same time. if only they could do that now! No.349, the ex-illuminated car, was by that time probably out of use, having been a generator car; and if I recall right, rail grinder 330 was at least in need of a repaint, though I believe it did run with splodge's of undercoat. |
|||
;)
;)
;)
;) Pictures 8, 9, 10 and 11 Another group of pictures showing Sheffield 189 operating at Crich c1967. |
|||
Original caption material supplied by Mark Burstow <M.Burstow@sheffield.ac.uk>
and David Johnson <DavidW.Johnson@bl.uk>